Step by Step Guide
How to build your new MTB out of the box
Our mountain bikes are partially disassembled for transport. However, with some helpful tips, you can get your bike ready for riding in just a few simple steps. Here’s our step by step guide!
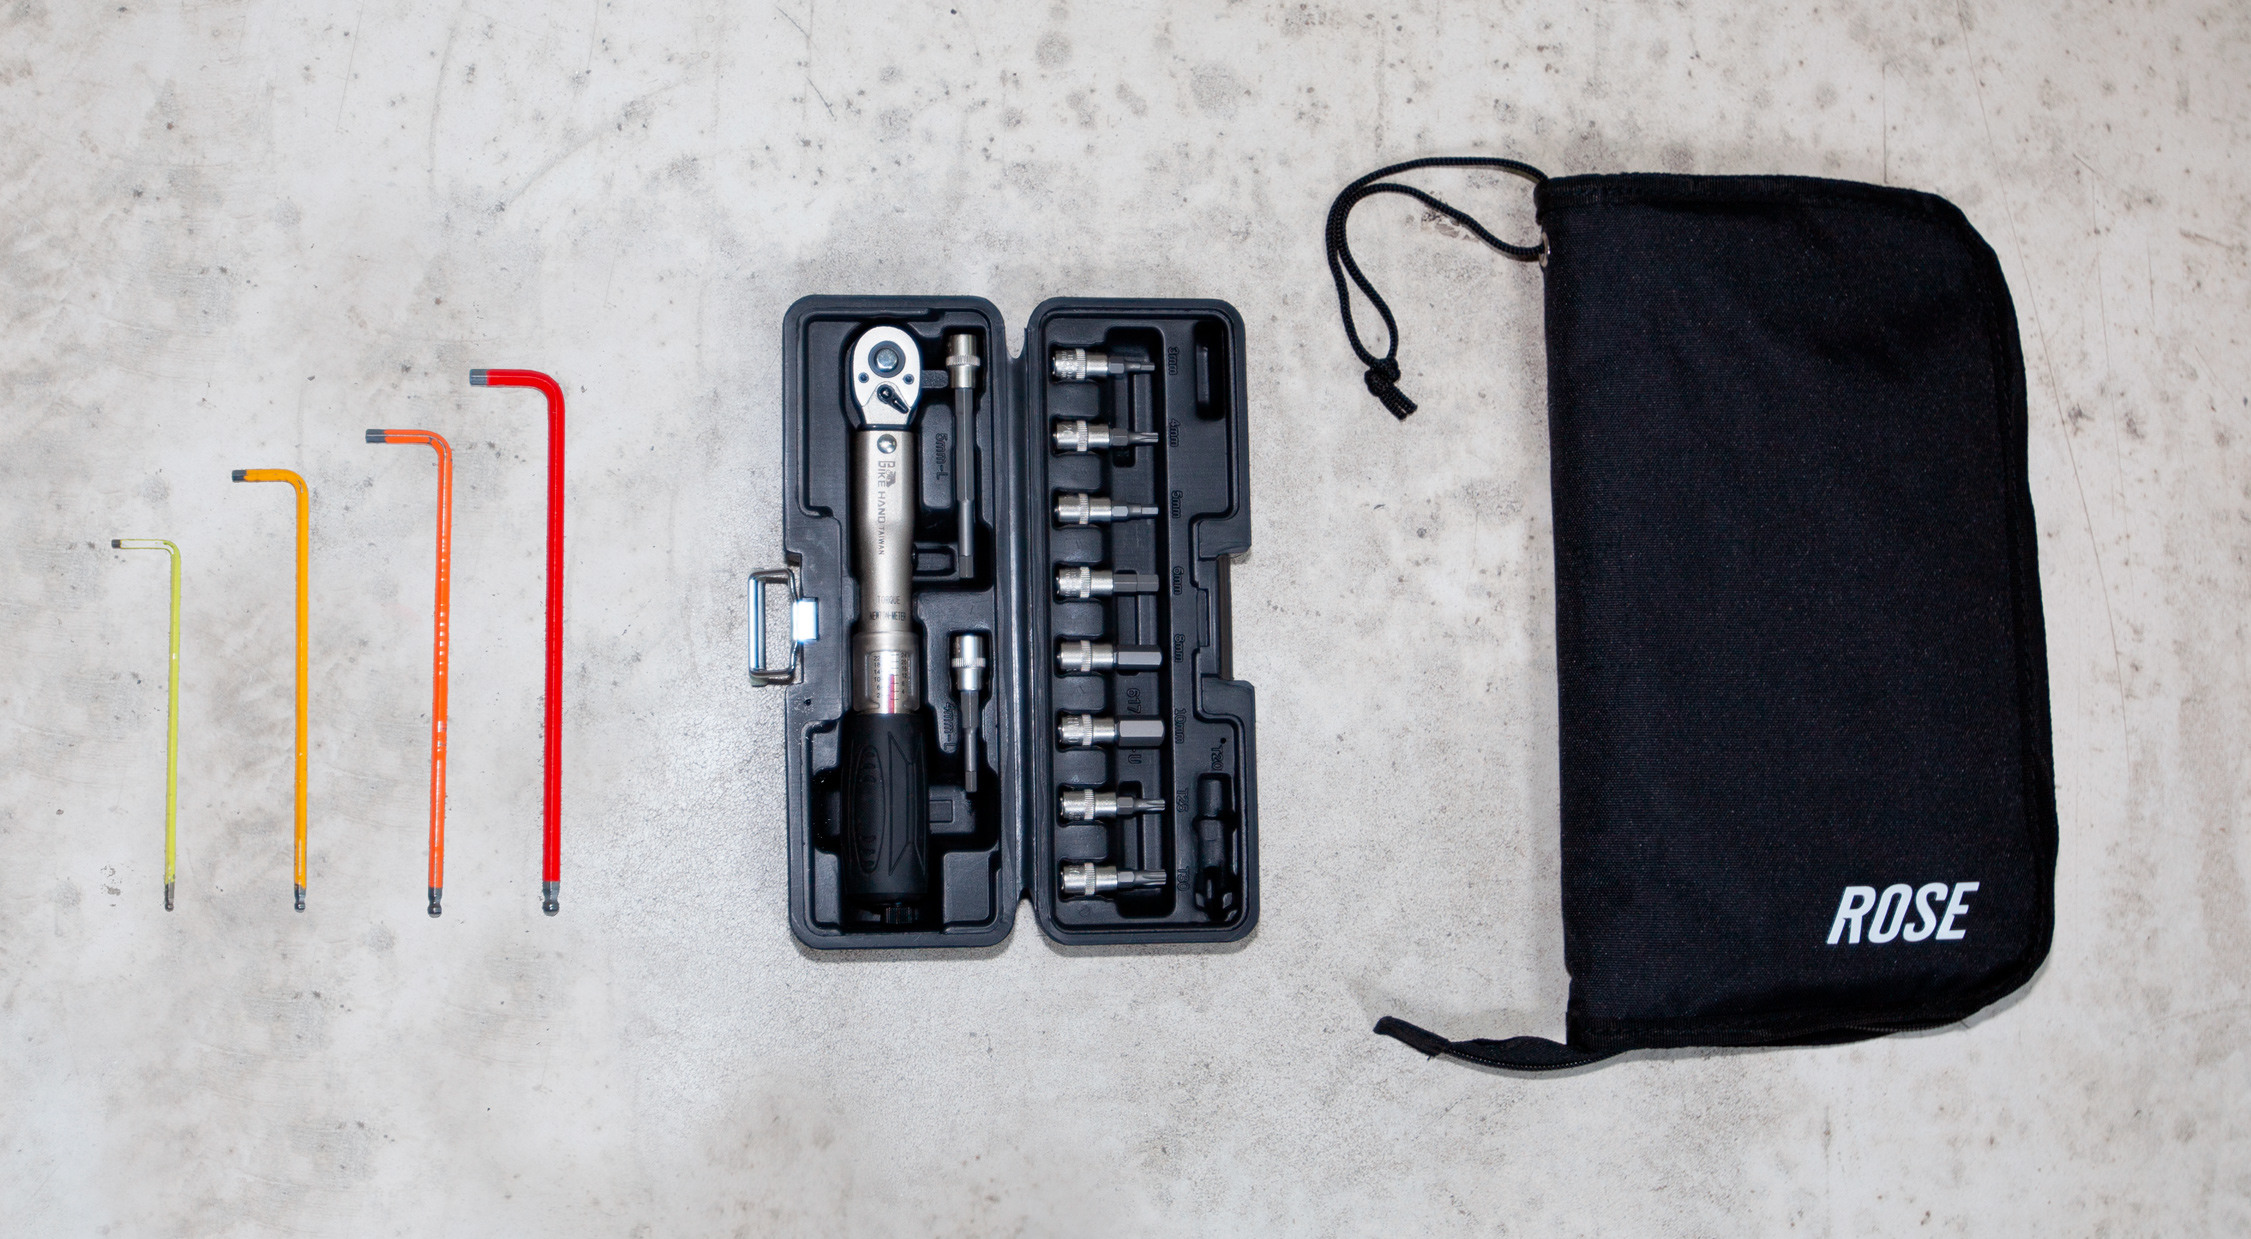
You need:
- Hex wrenches (4, 5, 6, 8 mm)
- T25 wrench
- Torque wrenches
- Pedal wrench (where required)
- Handbook
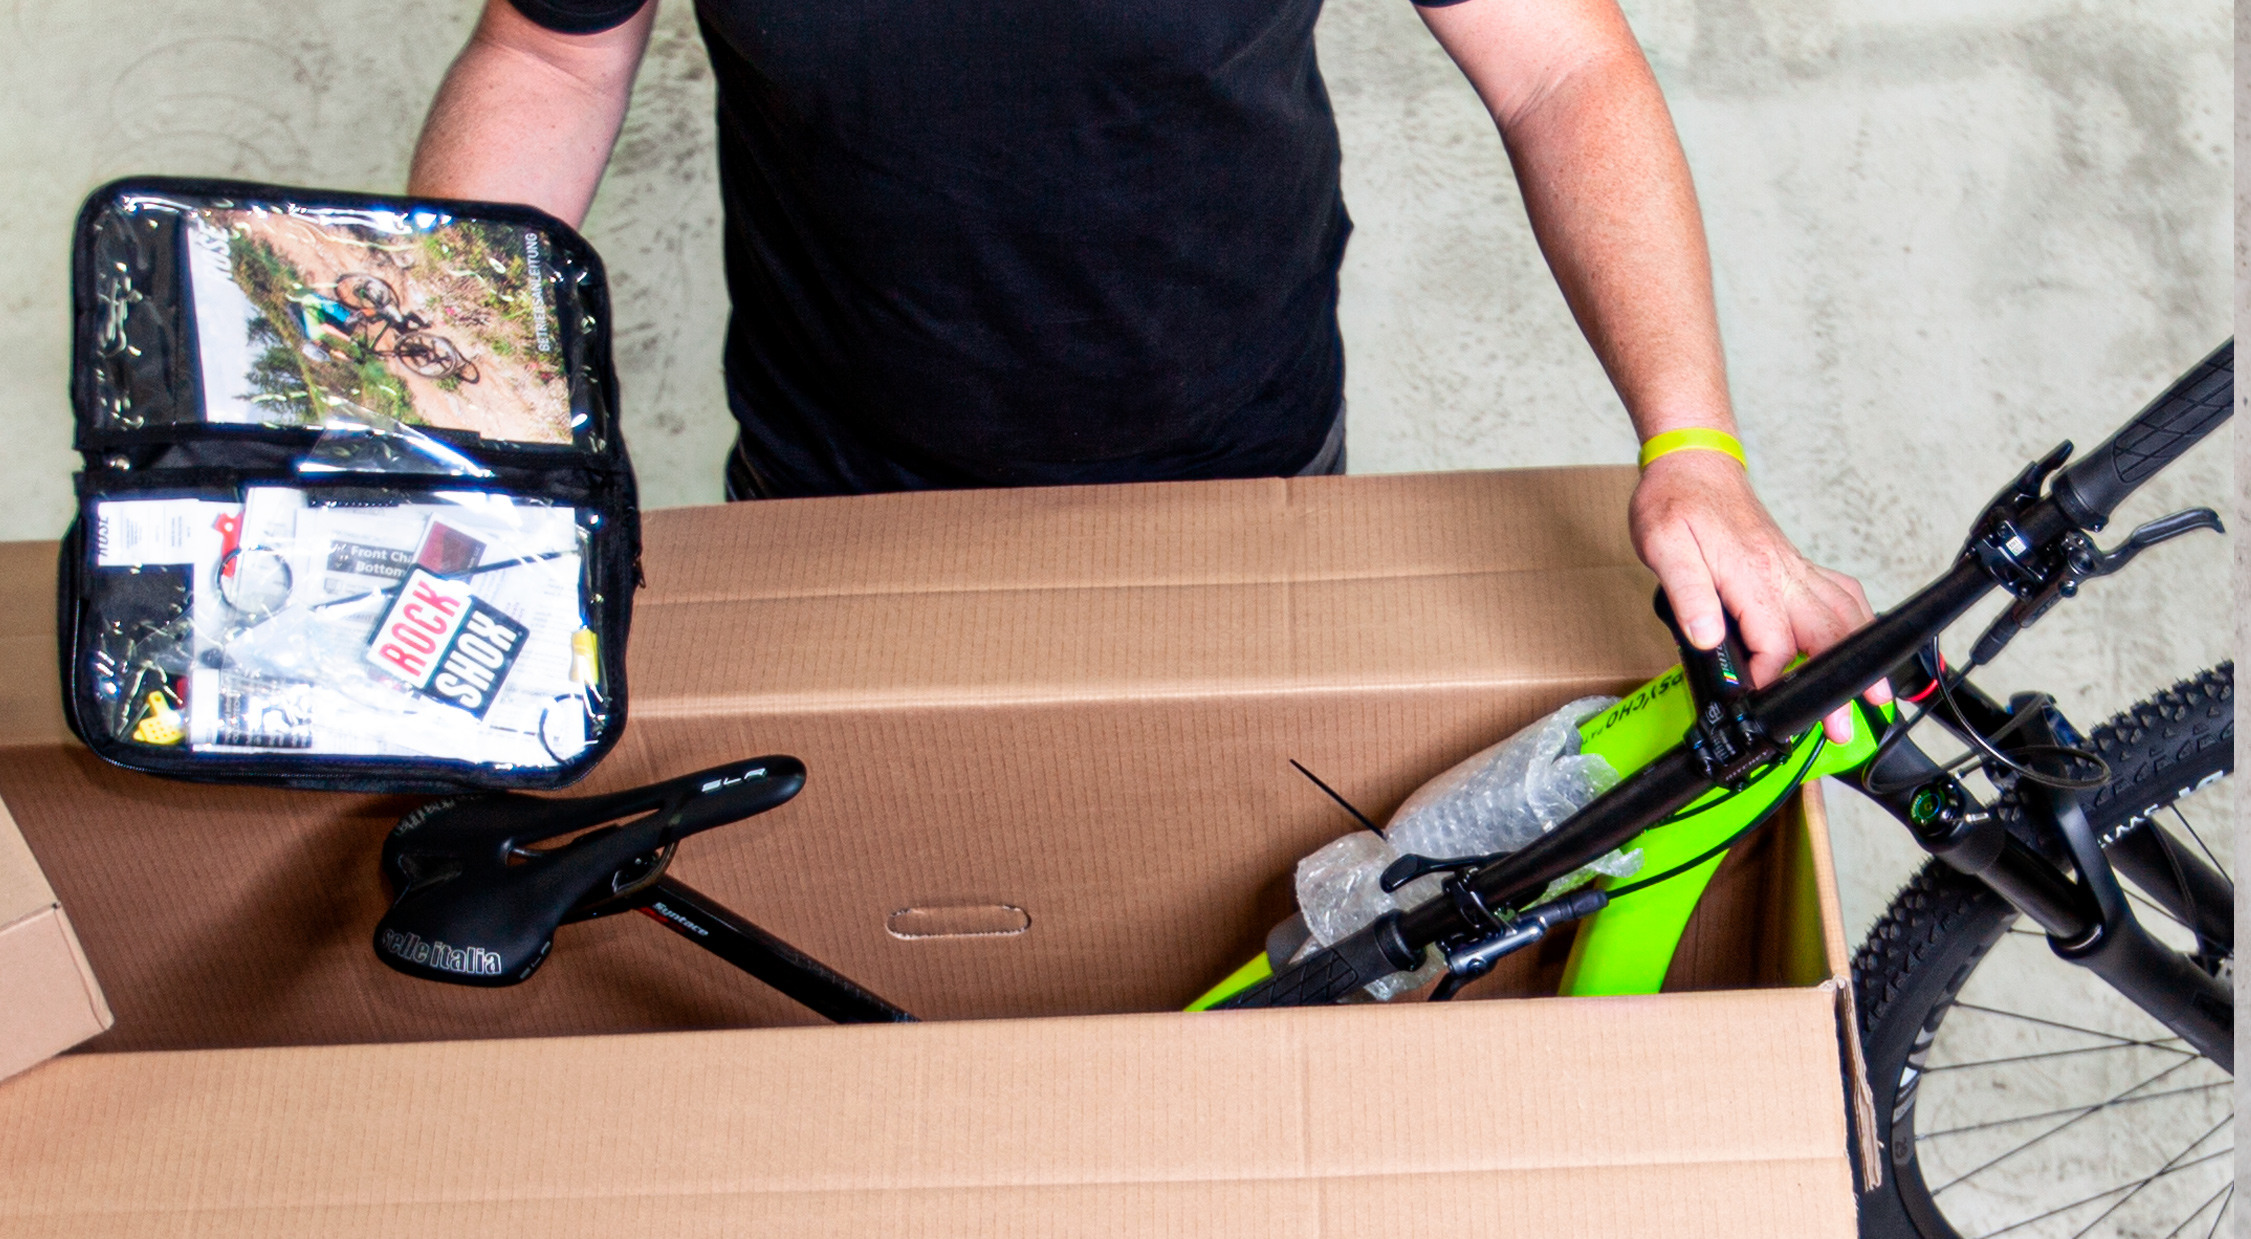
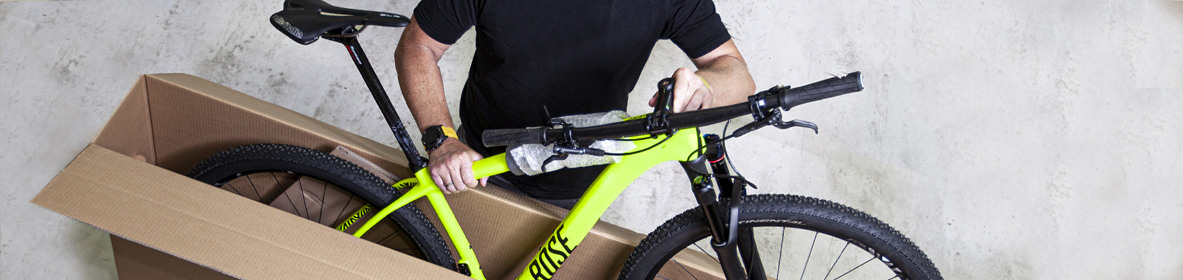
Step 1: Unboxing
- Remove your bike and all small parts from the box
- Inside the bike box, you’ll find 1-2 small parts boxes
- Remove all packaging from the frame
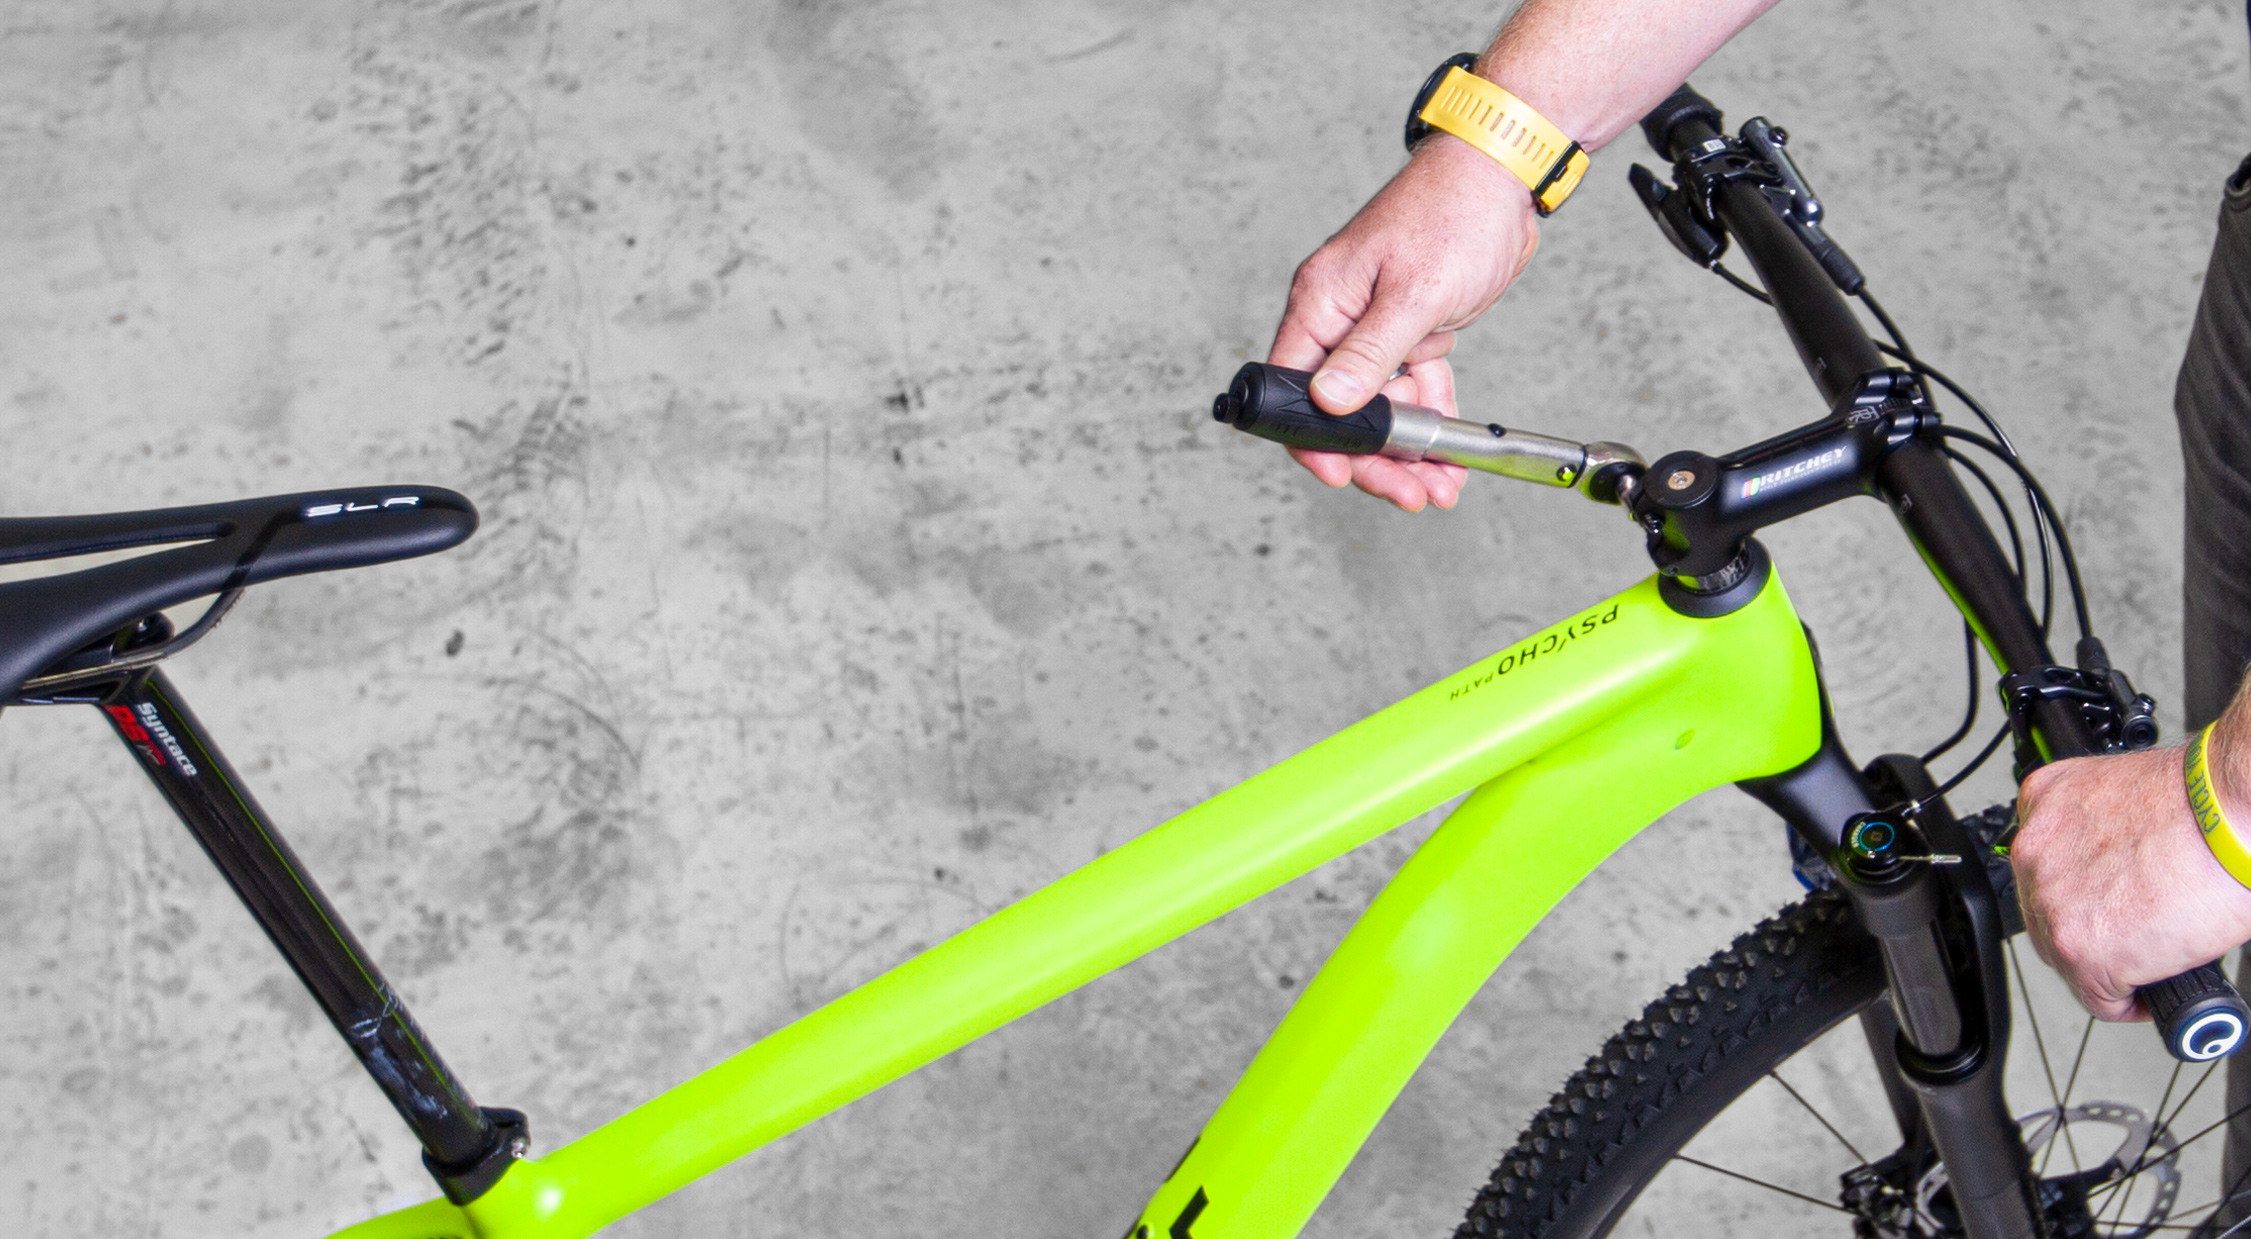
Step 2: Straighten the bars
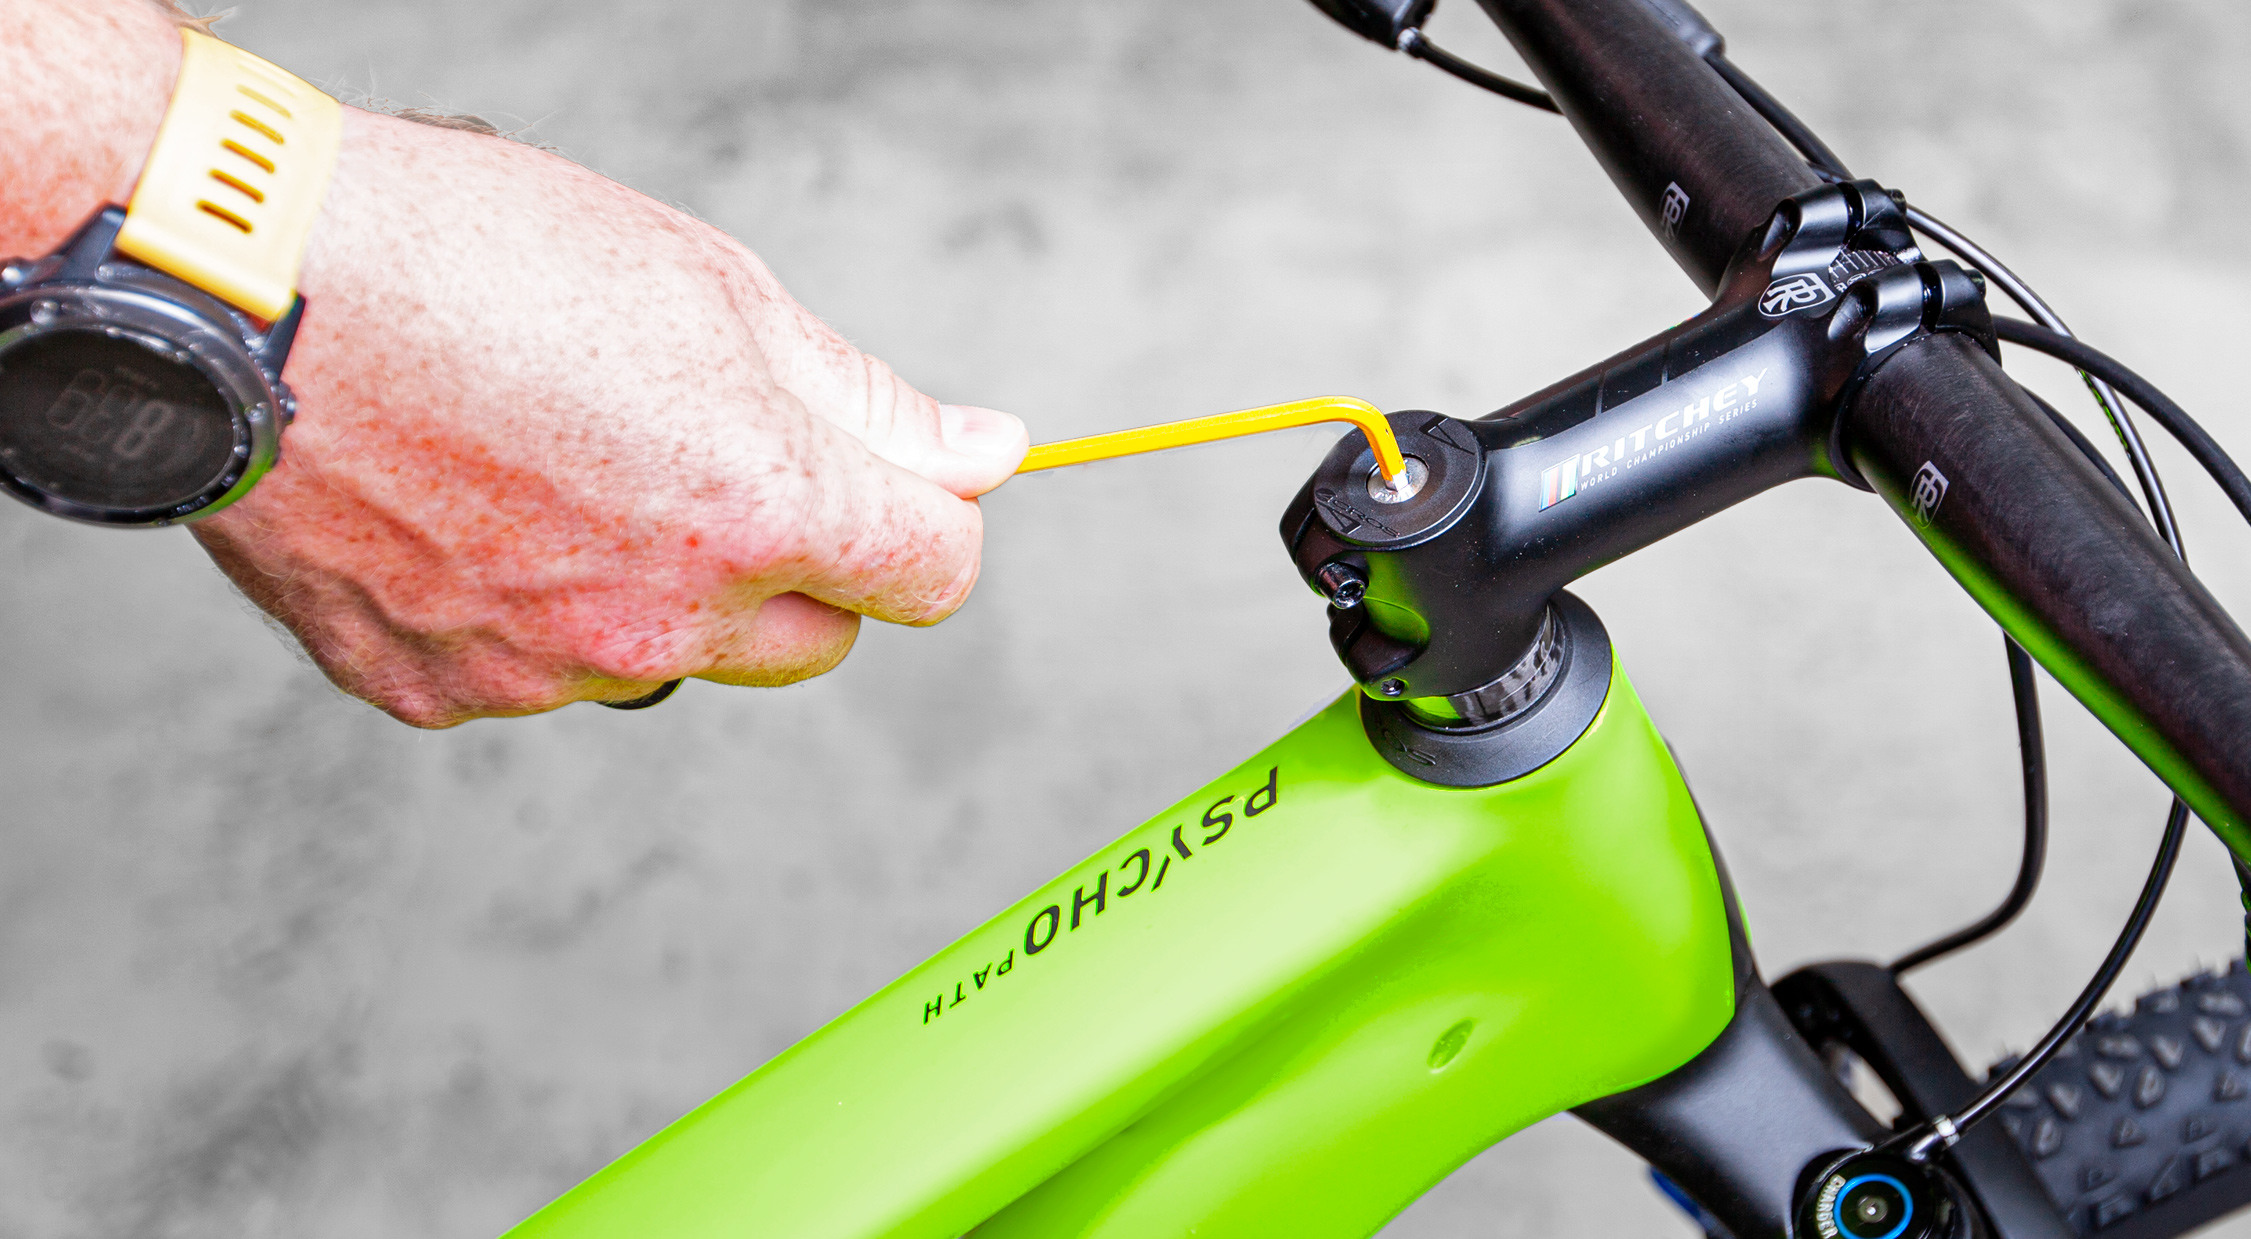
- Loosen the bolts on the stem
- Straighten the bars
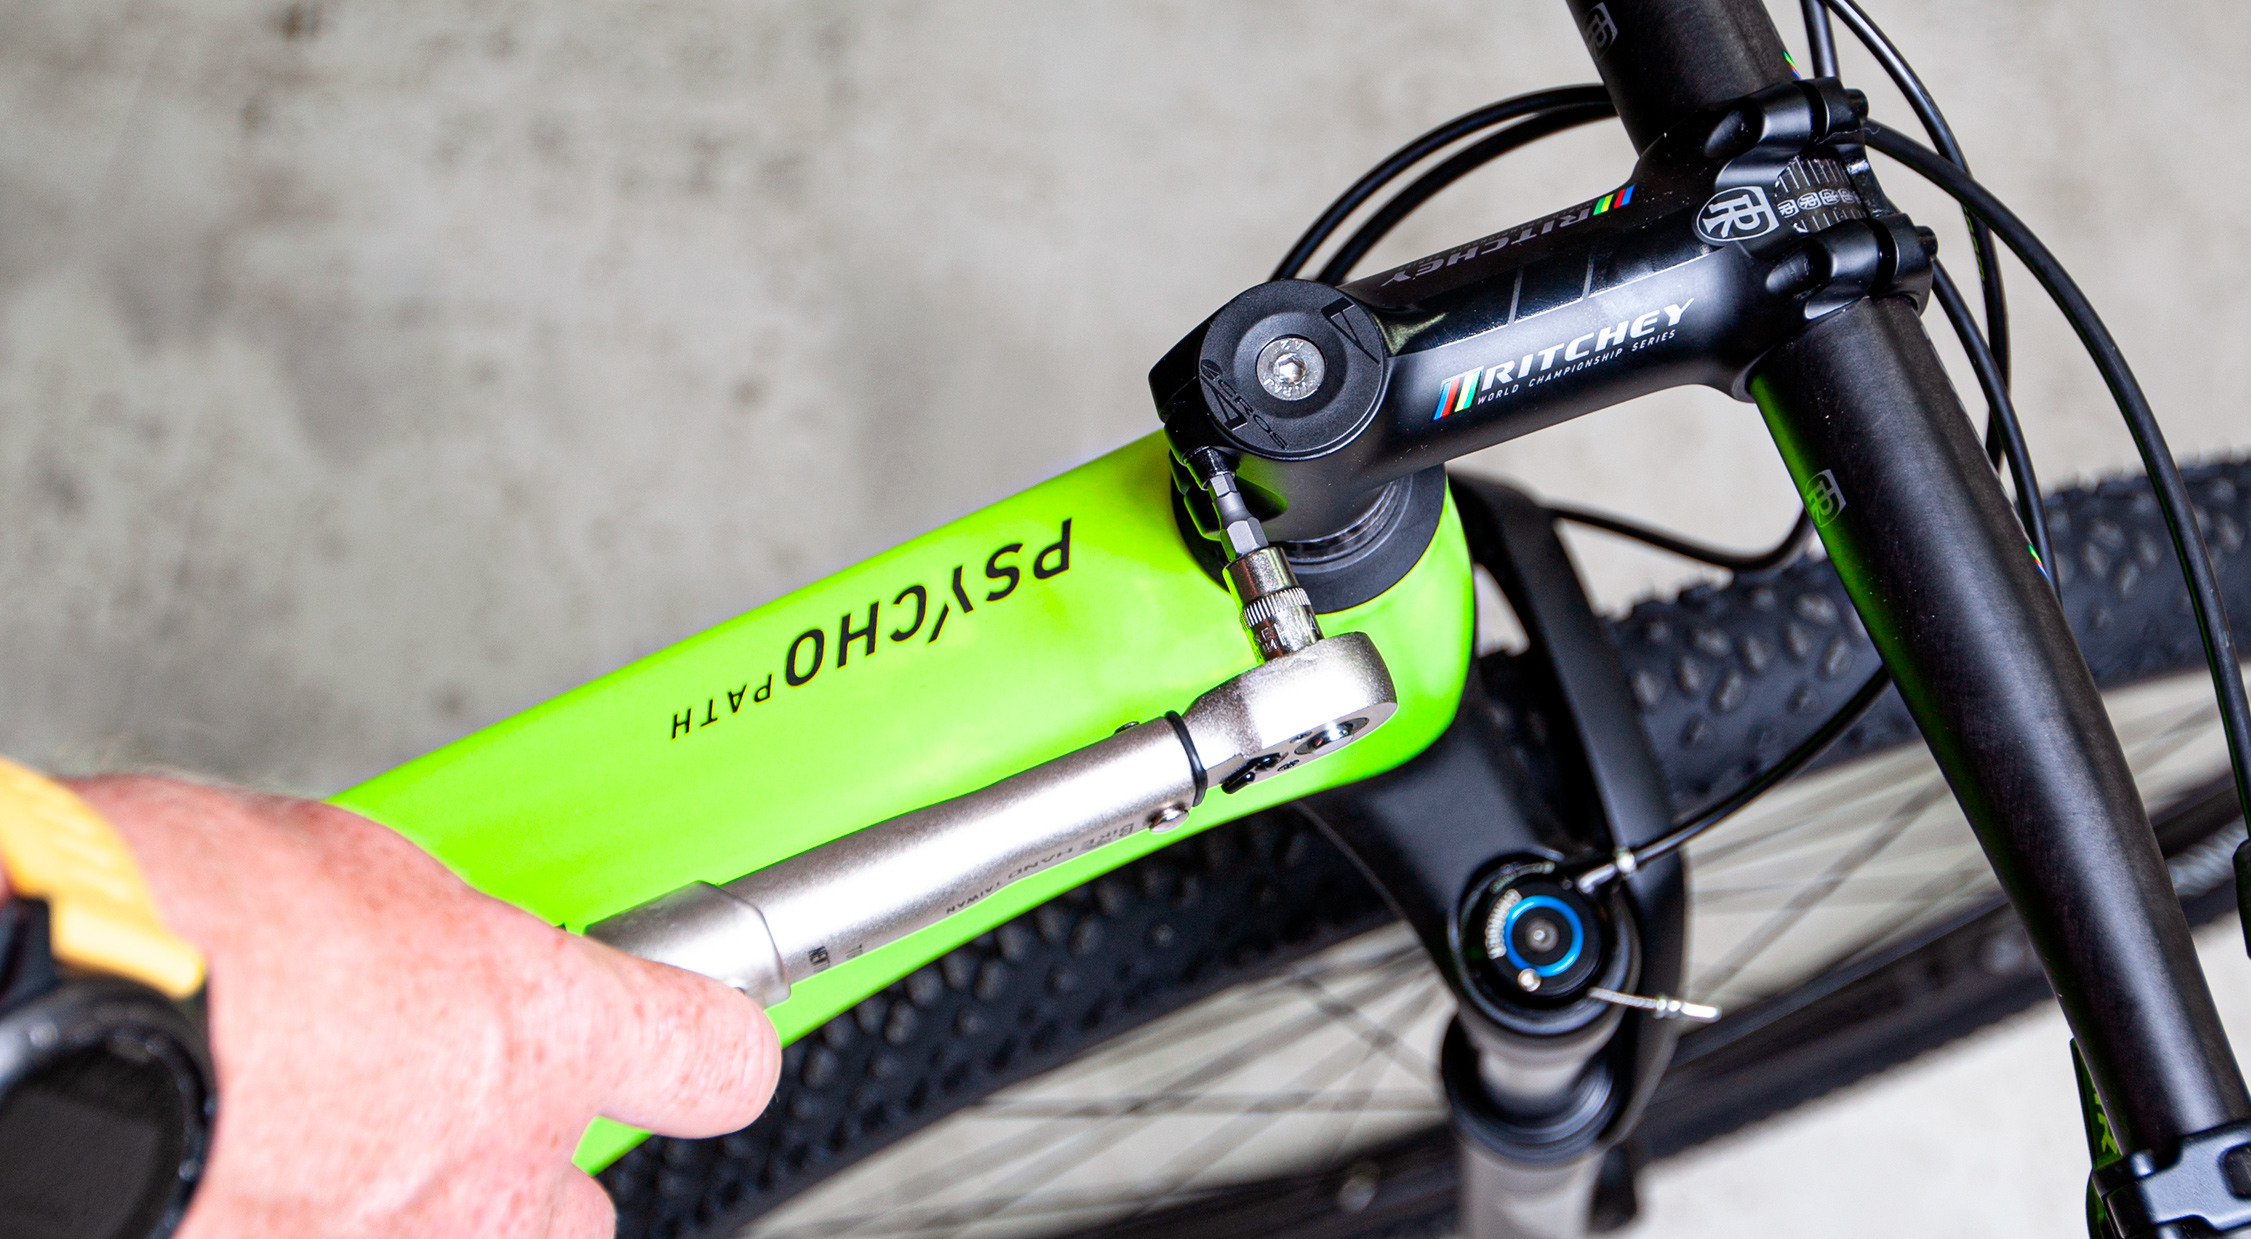
Step 3: Check the headset for play
- Squeeze the front brake lever
- Move the bike back and forth
- If there’s any play inside the headset, adjust the headset play according to the instructions given in the handbook
Step 4: Align your handlebars
- Twist the handlebars until they are centred
- Tighten the bolts in a crossing pattern, following the instructions you can find in the handbook
- Brake and shift levers may be rotated for shipping. Adjust and tighten the controls in accordance with the manufacturer’s instructions
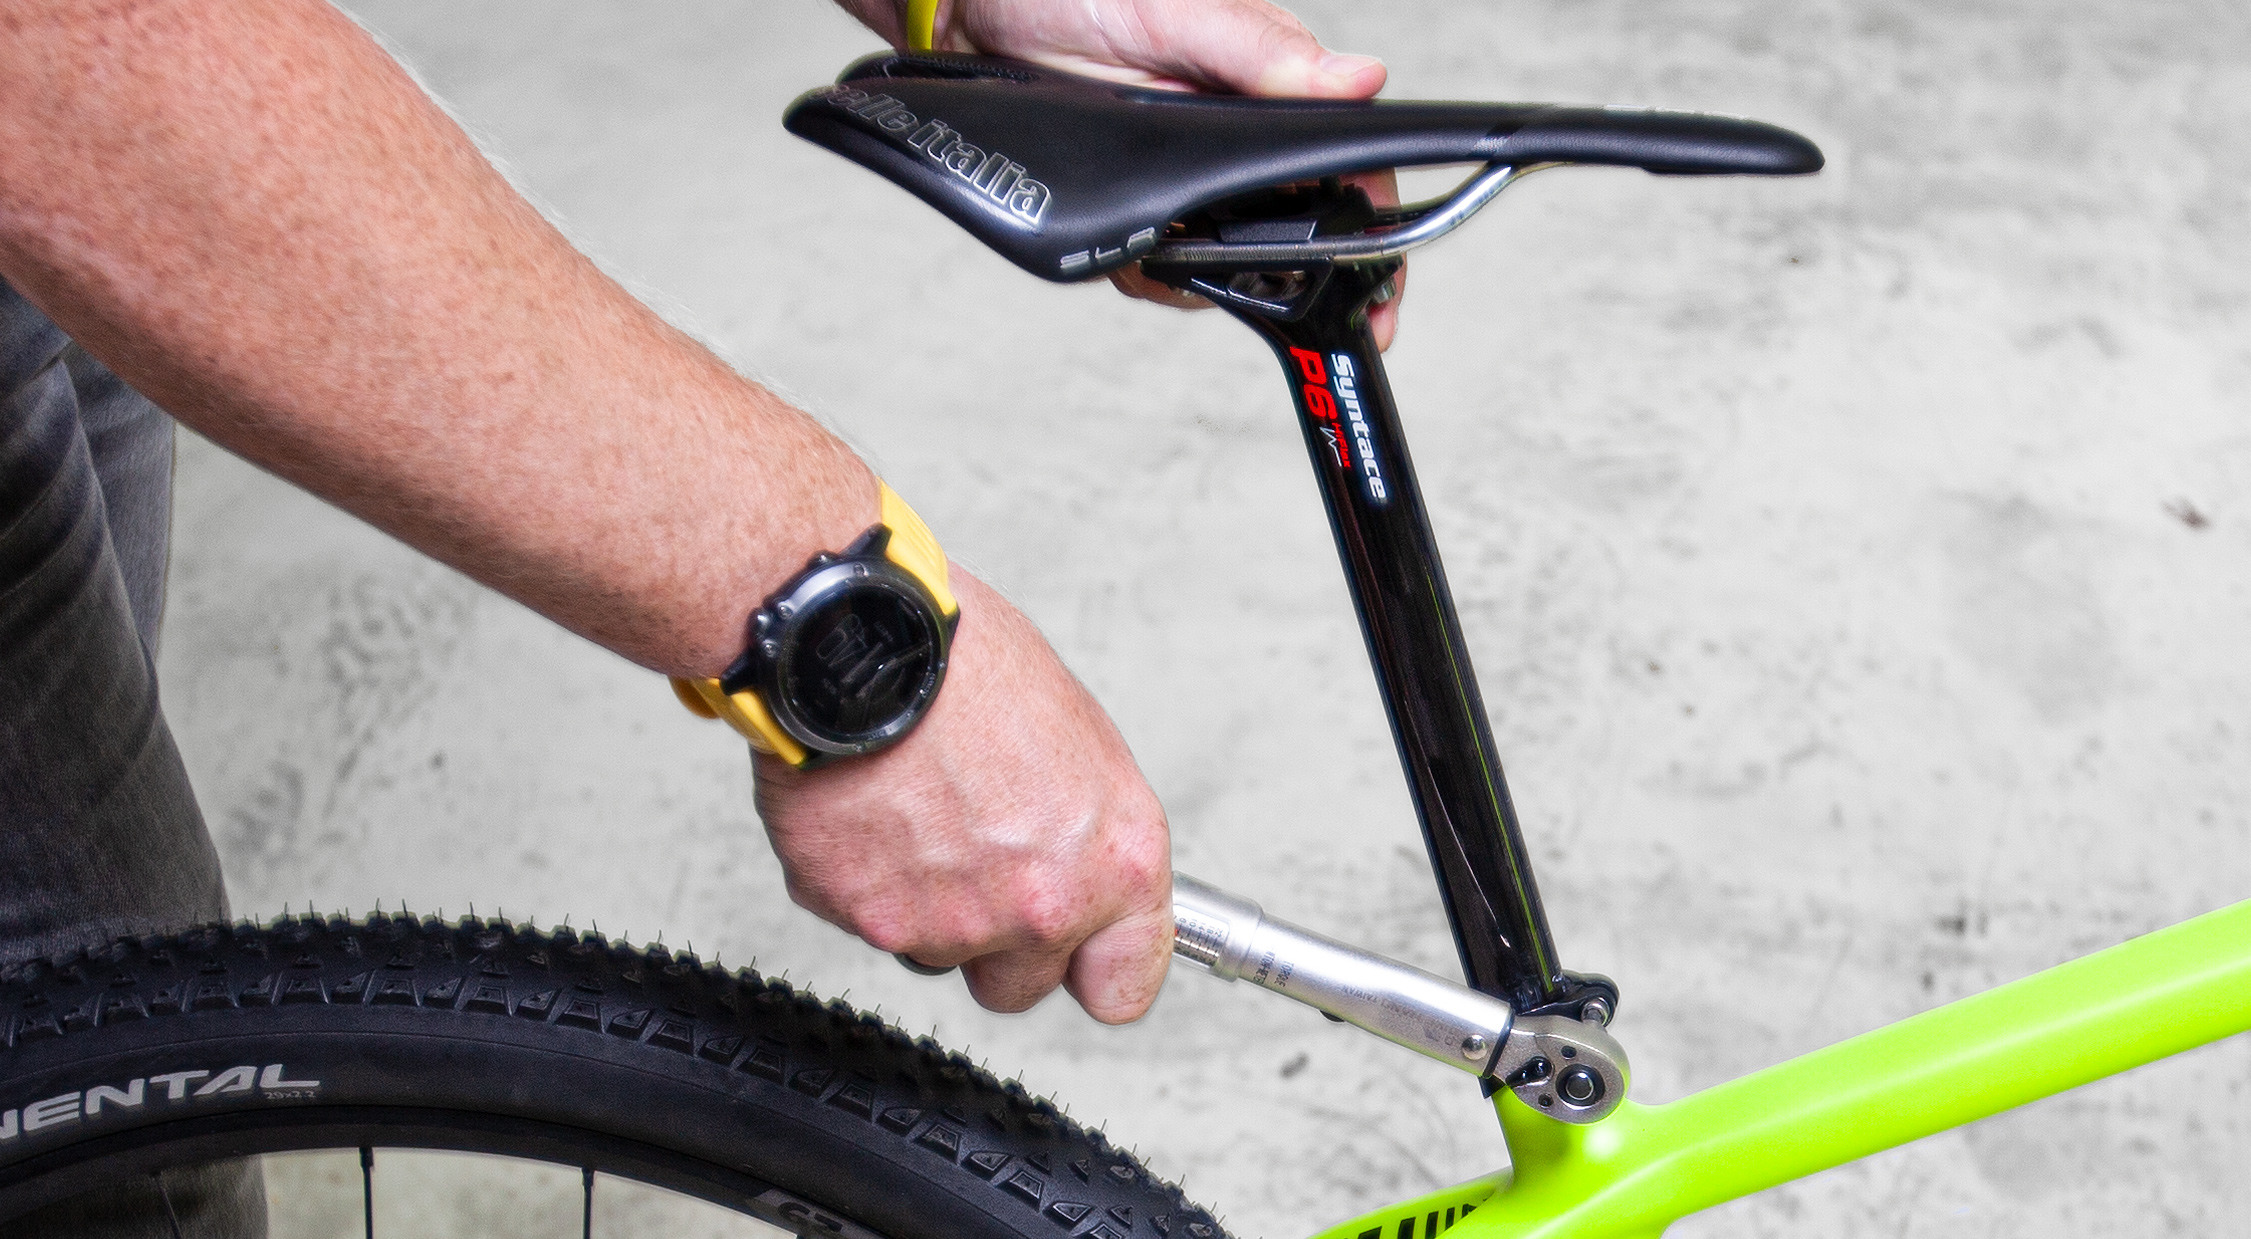
Step 5: Adjust the saddle height
- Undo the quick release or bolts on the seat clamp
- Get your seat adjusted properly and follow the maximum and minimum insertion recommendations
- If you have a dropper post, gently pull on the front end of the outer cable housing while pushing the post down into the frame
- Tighten the quick release lever or bolts on the seat clamp
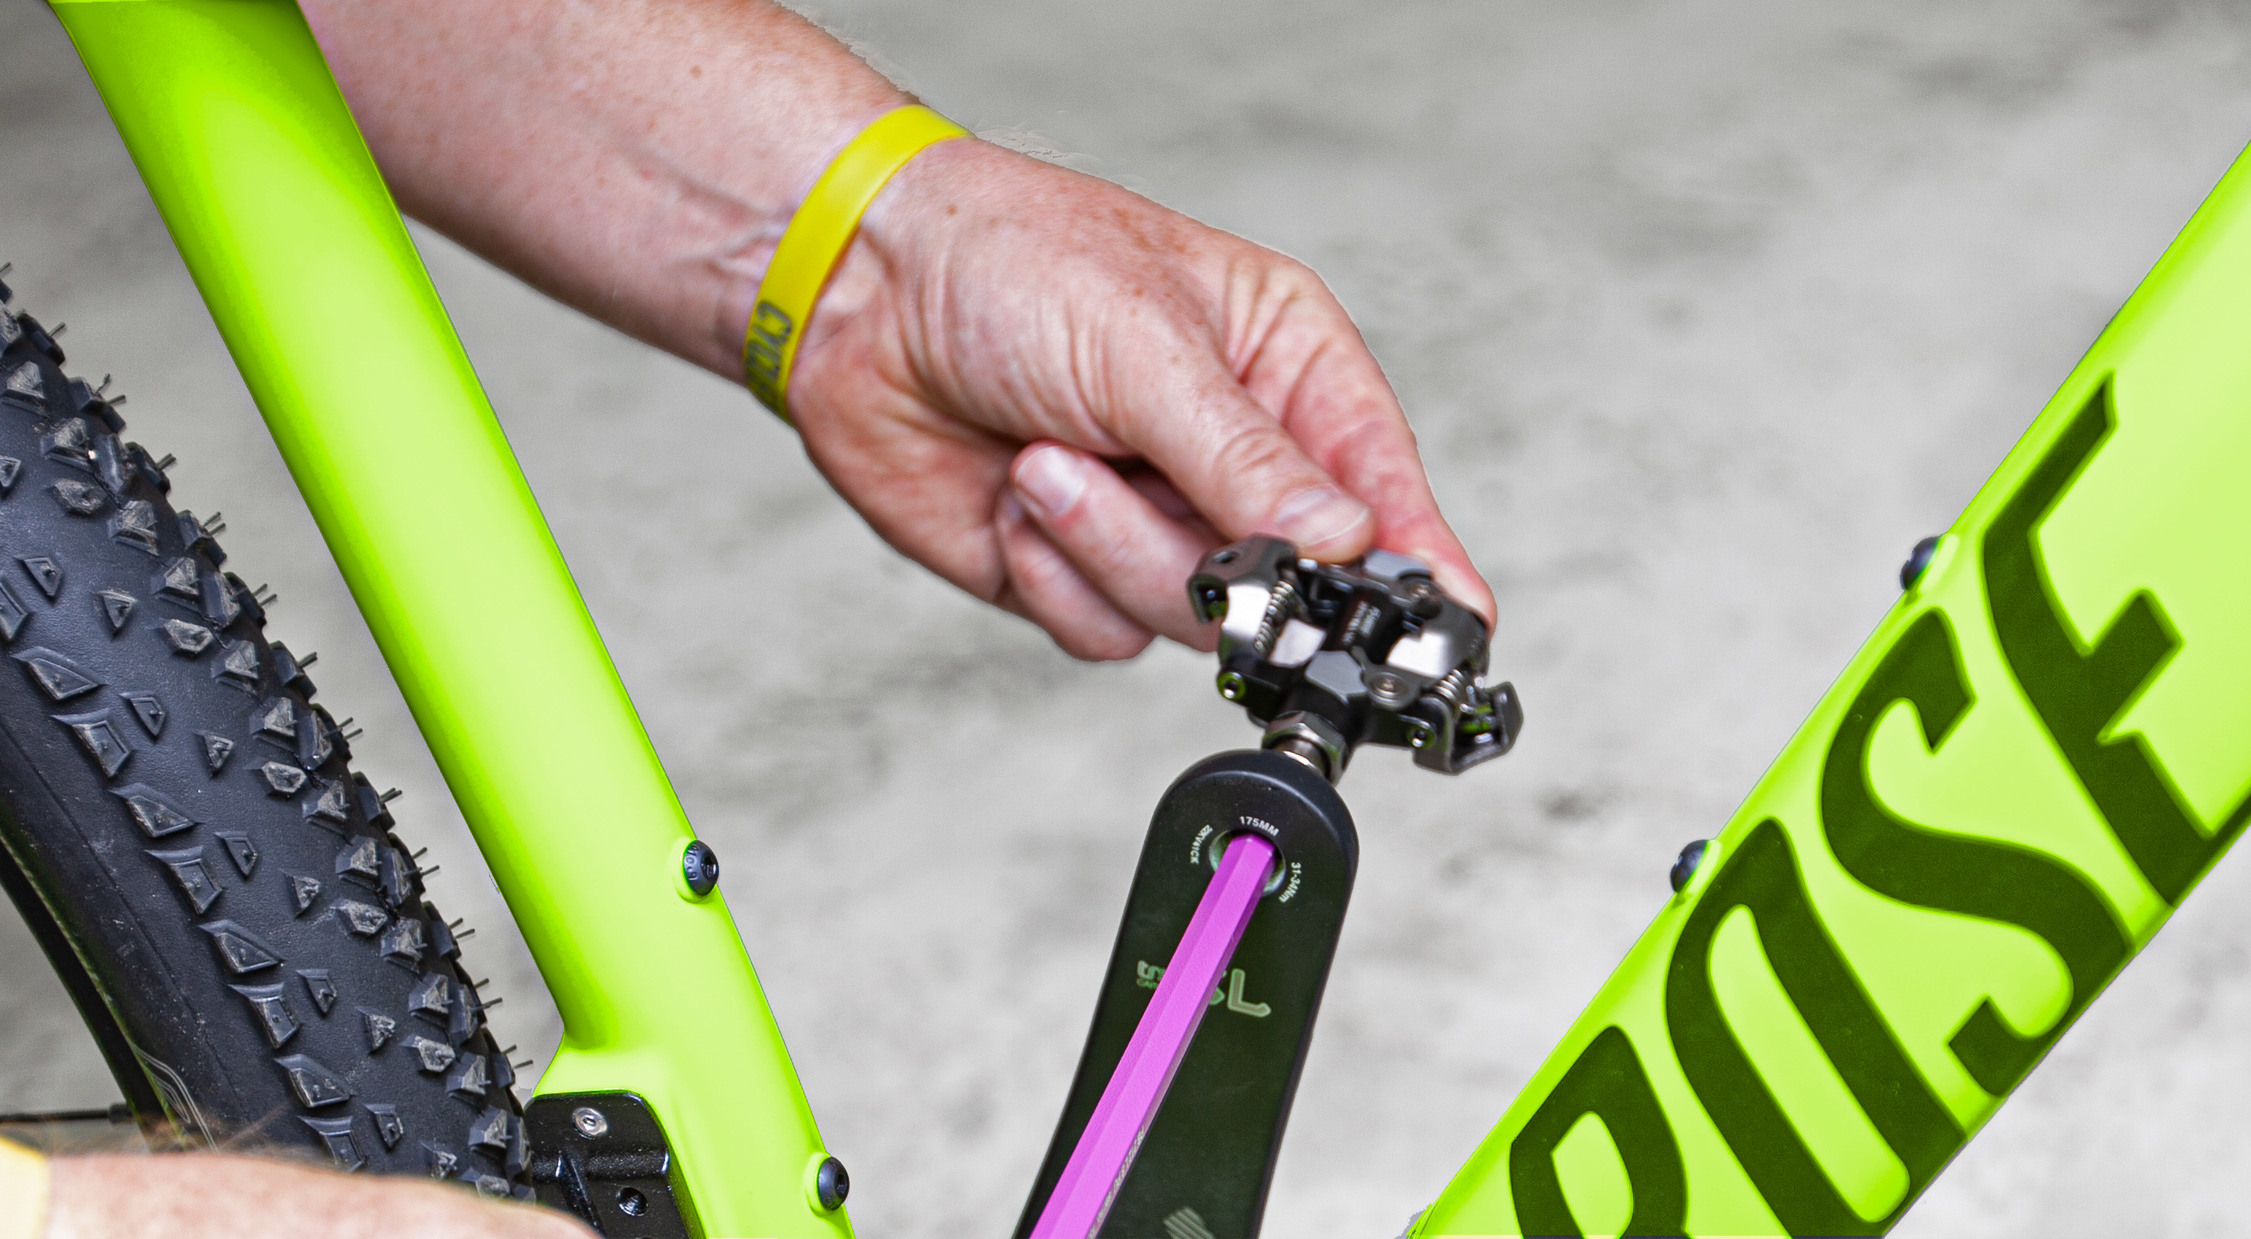
Step 6: Installing the pedals
- Most pedals have a groove around the spindle or a different marker to mark the left and the right pedal
- Place the pedal thread into its side’s crank arm
- Tighten the pedals according to the manufacturer’s instructions